Posts

Rustic Horseshoe Tack/Coat Rack

Image
  We have several pieces of cherry wood in the shop that was given to us. I thought it would be perfect for this project. The top piece is the main piece, which is 18" wide x 7 14" tall. The other piece I will use to cut 2 spacers which are 8" x 1 1/2". I will use 3 large cast iron horseshoes which are 4 1/2" x 4 1/2", but you can use any kind of horseshoes. I want to place the spacers on the main piece and screw in a horseshoe on each end and one in the middle. I glued the left spacer with Titebond 3, let it dry overnight and put a couple of polyurethane coats overall, including the right spacer. After I spray painted the horseshoes black and let dry, I screwed one horseshoe in the end of the right spacer. Each horseshoe will have 2 one-inch dry wall screws. Pilot holes were drilled beforehand. I glued the right spacer with horseshoe attached and let it dry overnight. I screwed in the other 2 horseshoes on each end. On the back of the piece I measured fro...

Christmas Lariat Wreath

Image
This is a tutorial on how to make a Christmas Lariat Wreath. First step: Find a used lariat. That's easy for me since I live in the middle of cowboy country! A zip tie at the top secures the rope. Tuck the tail into the rope strands. The ribbon was for a hanger, but in the end, I used wire. Some may want to use this idea. This is an old swag from my mother's decorations. I decided not to go this route. Wrap about 3 foot of garland  at the top. This provides fullness and a place to stick greenery. Stick in greenery. Add a bow. There are lots of videos on the internet on how to construct a bow. I used a pipe cleaner to attach. I attached red ball ornaments with wire. This would be complete unless you wanted to add a horseshoe. One idea is to use a glue gun to wrap ribbon and include a horseshoe. I chose to attach a horseshoe with a pipe cleaner. I tied on a bow, or you could glue it. The size of this wreath is 21 inches across. Have fun making your wreath! Merry Christmas!  

Cowhide Arrow Coat Rack

Image
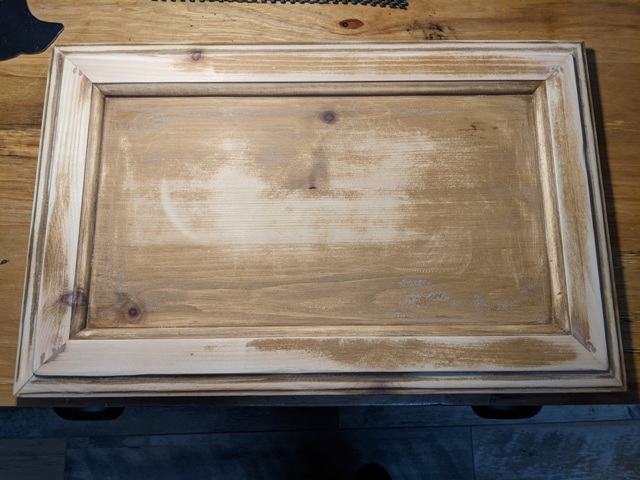
  I had a vision of black and white cowhide in a black frame with silver Arrow Hooks . Time to bring that vision to reality. We had several drawer fronts left over from our old kitchen and I used one of them for this project. I sanded as much of the stain as I could. I used peel and stick laminate where the cowhide would be glued. Blue painter's tape could be used instead of laminate. I glued a piece of plywood to the back of the panel to have enough thickness for screwing in the hooks. Then I spray painted the frame and back with black spray paint. I glued on black and white cowhide and added silver furniture tacks to the frame. I sprayed the Arrow Hooks silver and screwed them onto the cowhide. I love when a plan comes together! Modern with a western flair always works. What will you dream up and create?

Saddle Tree Decor

Image
  Here is an easy way to decorate western style for Fall. You may have an old saddle tree you could use or find one at a flea market. Or you may purchase our saddle tree  here . This decor would make an excellent table center piece, or place on an entry table, shelf, mantle, or porch. I put a piece of dry foam for floral arrangements underneath the saddle tree. You may need to trim it to fit and spray paint it black or brown. Then just add Fall foliage. Easy right? You need easy for the holidays. Enjoy!

Cowhide Can Koozie

Image
I had some cowhide scrap and decided to make a can koozie. I cut about a 15" x 8" piece. On the back, I laid down a regular koozie and drew a pattern around it. I used a ruler to make the lines straight. Since this koozie stretches, I made mine a little larger. I flipped it over and continued to draw the other half. This is what is would look like. I cut it out with leather scissors, or you could use a knife. It's ready for the can of your choice. I pulled the leather up around the can and held it with clothes pins. I put smaller clips to hold the leather in place and drew a line about a 1/4" from the can. This where I will sew with a sewing machine. Ready to sew. Sewn and ready to trim the excess. Trimmed. I turned it inside out and pulled it up on the can. It was tight and I let it sit overnight. The next day I stuck a pen in the side to stretch the leather and it worked perfectly. Next time I will make it a little larger. I found that this was not insulated enough...

Camp Stool

Image
  People are getting out more during these times enjoying hiking, camping, and boating. You might want to take along this nifty folding camp stool which can also be used as a side table. The overall dimensions are: 17" x 16" x 18 1/2" tall. Folded: 16" wide x 3" deep x 22" tall and weighs 8 1/2 pounds. If you want to build this stool this tutorial is for you. If you want to buy it, go here .  Here are the different parts. This stool is made of cypress and plywood, but any wood is fine. Here is the folded stool, nice and compact. You will need 4 seat support pieces and 4 leg pieces. One end of each is rounded and the other end is cut as shown. Measure 1/2", cut 45 degree angle as shown. 4 pieces 14 3/4" x 1 3/4" x 3/4", 4 pieces 22" x 1 3/4" x 3/4" with 2 holes - 11" between hole centers. You will need 2 - 1/2" plywood seat pieces 8 3/8" x 15 3/4" and 2 bottom supports 3 3/4" x 15 3/4" x 3/4...