Posts

Showing posts with the label wood projects

Candle Lantern

Image
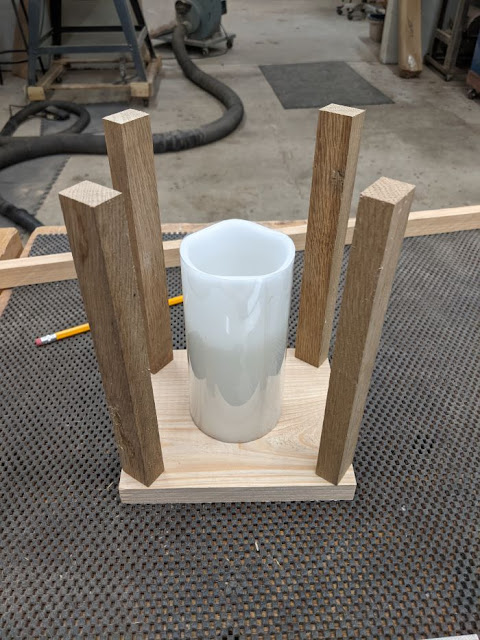
  Candle lanterns are so popular and there are endless ways to decorate them. So, I thought, why not make one? Instead of the posts being square with the base, I decided to angle them 45 degrees. I went with the wood I had. The barn wood posts are 8 1/2" tall x 1" x 5/8". The cypress base is 6 9/16" x 5 5/8" x 3/4". The top piece consists of 2 pieces that are 3 11/16" x 1" x 3/4" and 2 pieces that are 6 9/16" x 1" x 3/4". After assembly, The Candle Lantern will be 10" tall. To make the top piece, I arranged the pieces on top of the base to keep them square. Glue, clamp and let dry overnight. A board was clamped to the table saw fence. Each post was glued on one end, placed on the base and against the 'fence board' and nailed. Blue tape was placed on each corner of the base to show exactly where each post should be placed on a diagonal. Glue was applied to the other end of each post and top piece was nailed on. I u...
Texas Flag in Barn Wood Frame

Image
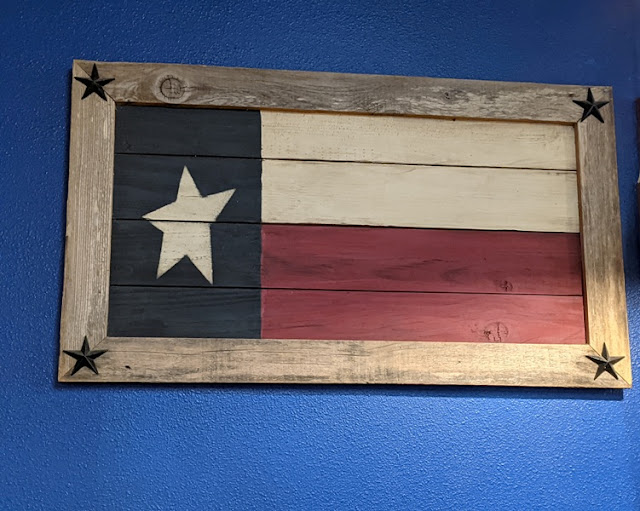
  I saw this Texas flag in a local restaurant and decided this would be my next blog project. It turned out the date of the blog would be March 1st, one day before Texas Independence Day! So, I built this flag as a tribute to my great state of Texas. I tried to conform to how the flag is officially described by law such as proportions and dimensions of the colors. Here are the dimensions I used for the barn wood I had on hand. I cut the boards to length and width and glued the frame together. After it dried, I stapled the back corners with a pneumatic stapler. I cut a piece of plywood 25" x 18" and glued and stapled it to the back of the frame. Flag boards are ready to paint. The painted flag boards will be glued onto the plywood backing. I tried to paint the flag boards faded and vintage, so I did a lot of experimenting with acrylic paint. I glued the boards onto the plywood backing and clamped them. I painted a large star nail, drilled a pilot hole, and nailed it into the f...

Western Cutouts

Image
Western cutouts are great fun and they can be used in so many ways. I drew and cut them out of plywood on a scroll saw. You can cut them out of cardboard, leather or thick paper. You can paint or stain them and then you can: Glue them to a skewer to stick in flower arrangements. Drill a hole in each and add jute to make ornaments. Glue them to boxes or frames. Make Garland. Drill a hole if it's wood or leather and make a key fob. Attach a hook to display on your saddle. It doesn't have to be western. You can make any shape you want, such as Christmas cutouts. Choose your theme, cut out your shapes and create!

Rustic Frame with Conchos

Image
Old wood from old barns and buildings, which included red and white oak, was used for the cabinetry in our kitchen remodel. This wood is dense, heavy and very strong. The kitchen crew rebuilt some of our cabinet doors, so in this project I'm using the cabinet door reject scraps. Since the cabinet door frames had this groove on it for panels, I thought it would be perfect for making picture frames or mirrors. I cut off half of the groove on the table saw to create a place for a picture or mirror. I cut the boards to make a 16" x 20" opening. The outside dimension of the finished frame is 20" x 24". My plan was a rustic looking turquoise color and add large 2 1/4" conchos to the corners and center 3 3/4" silver clavos on each side. I glued it together and nailed it with a brad nail gun on the edges at the corners and used a staple gun on the back corners. This would look good with a coat of polyurethane, but I wanted to ...

Lazy Susan

Image
Since a friend showed me a bamboo Lazy Susan she picked up at a garage sale, I've been wanting to make one. The Lazy Susan has many uses and are great for holiday gatherings. First, I looked around for a bearing kit and found the Lazy Susan Slimline here . It has easy to follow instructions. I wanted it thin for a low profile and this is 7/64" thick and 12 5/8" wide. I chose pecan left over from my kitchen bar for the top piece. Scraps of mahogany were used for the bottom piece. Plane down the pieces to the desired thickness. These are planed to 9/16" thick. Glue the pieces together and clamp. Let dry overnight. Draw the desired size circle on both pieces and cut out on a band saw. The top piece is 16 1/2" wide and the bottom piece is 13 1/4" wide. On the bottom side of the bottom piece drill a 9/16" wide hole 1/8" deep using a Forstner bit. This was done on the drill press. Drill a 5/16...

Wooden Stencil Tray

Image
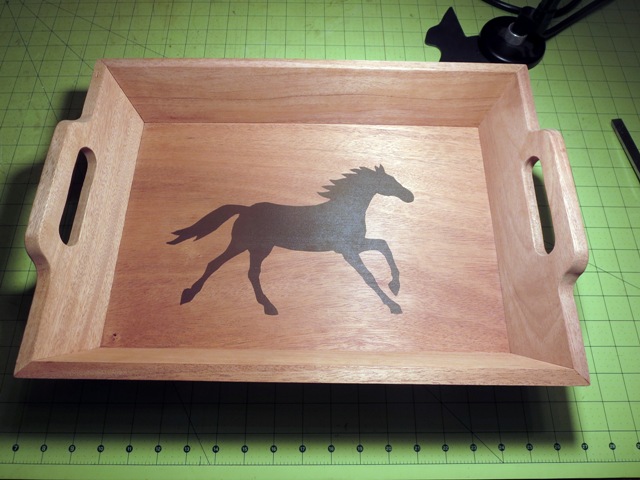
I've always wanted to make a wood tray with slanted sides. The internet didn't have much to offer, but I gave a tray I had to a friend and he figured the angles, cut sample pieces and wrote down instructions. Much better than the internet! Sample Pieces Template Tray This project can get tricky and you need to think about what you're doing every step of the way. Decide what size tray you want. How long and tall will the sides be, etc. The tray for this project is 12 3/4" wide x 18 3/8" long at the top of the handles. A side piece measures 2 3/4" x 17 7/8" x 1/2". The end piece measures 2 3/4" x 12 3/4" x 1/2". If you measure the slant the side is 3" and the end is 4". You can make it out of ply wood or any solid wood. I chose mahogany for this project. Turn blade on table saw to 17 degrees and rip one side, flip board and move saw guide to the desired thickness and rip. The top and bottom are parallel to ...