Posts

Showing posts with the label leather

Cowhide Coaster Box

Image
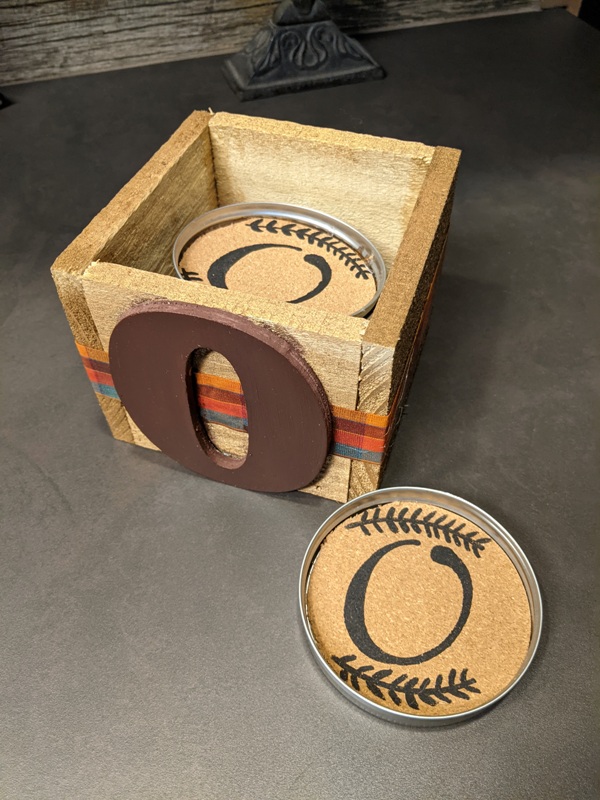
  A friend of mine made this coaster set and box for me. Very cute, and some may want to go this route, but it gave me an idea to make one western style. Here are the wood pieces for the box. Four sides of mahogany, or any wood you have on hand, and a plywood base. There are two pieces 5 3/4" x 2 3/8" x 1/2" and two pieces 6 3/4" x 2 3/8" x 1/2". The bottom piece is 5 3/4" x 5 3/4". The box is glued together, and brad nailed to secure. I cut a piece for a lid and glued a smaller piece to the underside to fit inside the box. The lid dimensions are 6 3/4" x 6 3/4" x 1/4" and the smaller piece is about 5 5/8" x 5 5/8". I glued hair-on cowhide around the box. I glued cowhide to the top of the lid. I painted the bottom of the lid and the bottom and inside of the box black. I spray painted a steer drawer pull oil rubbed bronze and mounted it to the top of the lid. I placed a strip of leather 1" wide around the box and nai...

Cowhide Can Koozie

Image
I had some cowhide scrap and decided to make a can koozie. I cut about a 15" x 8" piece. On the back, I laid down a regular koozie and drew a pattern around it. I used a ruler to make the lines straight. Since this koozie stretches, I made mine a little larger. I flipped it over and continued to draw the other half. This is what is would look like. I cut it out with leather scissors, or you could use a knife. It's ready for the can of your choice. I pulled the leather up around the can and held it with clothes pins. I put smaller clips to hold the leather in place and drew a line about a 1/4" from the can. This where I will sew with a sewing machine. Ready to sew. Sewn and ready to trim the excess. Trimmed. I turned it inside out and pulled it up on the can. It was tight and I let it sit overnight. The next day I stuck a pen in the side to stretch the leather and it worked perfectly. Next time I will make it a little larger. I found that this was not insulated enough...

Leather Tray

Image
I always wanted to mold leather into a tray. I had a piece of embossed leather and used an old 8" x 8" metal cake pan for the mold. I cut flaps on the corners of the leather and failed to take pictures of that step. Here is a diagram of how I made the cuts. I filled the sink with warm water enough to cover the leather and let it soak for a minute. I molded the leather onto the pan. I used thin pieces of wood on the sides to uniformly clamp the leather to the pan. Since a bit of metal color came off on the leather, it is a good idea to spread plastic wrap over the pan before the leather is applied. I let this dry completely. It worked very well. I put a leather finish on the leather. The plan was to glue the flaps and attach rivets, but I thought it would look better with a smooth leather strip around the outside. The leather strip is molded just like the tray. This time I put plastic wrap on the cake pan, then placed the leather tray over it. I...

Hat Bands

Image
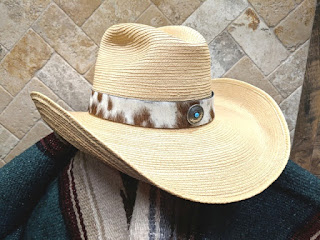
Fall Activities are coming up and what better way to show off your style than to wear a hat band that you made yourself. Here are 6 different styles that are easy to make. I used a palm leaf hat to model the hat bands. Just wet it in the sink, form it into any style you want, and let dry. If you make a mistake, rewet it and fix it. I attached a Rhinestone Star Pin to a grosgrain ribbon for this style. You can also add pins to the hat. I wove a 5/8" x 46" black grosgrain ribbon through eight 1 1/2" slotted conchos. Tie the ribbon in a square knot in the back and let the ends dangle. Or you can tie it in a bow. I cut a 1" x 23 1/2" strip of veg tan leather, painted it black and attached 2 types of rivets. I cut an extra piece for a keeper in the back. I stapled the ends together and glued the keeper on the band using Titebond. I got a little off on the staples but it worked. Here's how it looks in the back. ...

Western Style Mirrors

Image
I've always wanted to make western style mirrors. I bought a couple of mirrors from the craft store, one 12"x 12" and the other 10" round. I used the weathered wood frame from the Clocks blog. Since I used epoxy to 'glue' in the tile, it took a while to get it out and clean it up. I had to rout out a little wider for the mirror since it was larger. I cut strips of leather 1" wide and attached with Star Tacks . My husband's industrial strength glue gun worked nicely for mounting the mirror in the frame. A different idea would be to attach hair on cowhide pieces to the corners with upholstery nails and add barbed wire on the sides. Now for a lariat mirror. I took a lariat and wound it tight to fit around the 10" mirror. I first taped it together  so I could wrap leather lace on each side. Then I attached leather laced conchos. I cut a piece of plywood on the scroll saw a little smaller than the lariat and glued the mirror onto it....

Custom Lariat Basket

Image
This is a custom lariat basket made for a customer to give as a wedding gift. I burned the design into leather and epoxied the leather to the bottom of the basket. Three different colors of rope were used. Starting at the bottom: tan, red, green, tan, red and green at the top. Each time I changed color of rope I had to splice the two different ropes together. On one color change instead of splicing I started the next color rope with the tassel end. The basket ends at the top with a tassel. The customer wanted tan, then red for the desert, then sage. I had already thought of that. The tan for the earth below, the red for the desert, and sage for the plants above. Perfect for a desert style basket for a customer in Arizona!