Posts

Showing posts with the label Holidays

Saddle Tree Decor

Image
  Here is an easy way to decorate western style for Fall. You may have an old saddle tree you could use or find one at a flea market. Or you may purchase our saddle tree  here . This decor would make an excellent table center piece, or place on an entry table, shelf, mantle, or porch. I put a piece of dry foam for floral arrangements underneath the saddle tree. You may need to trim it to fit and spray paint it black or brown. Then just add Fall foliage. Easy right? You need easy for the holidays. Enjoy!

Decorative Cross

Image
I was cutting out these shelf brackets from mahogany and noticed a pretty left-over design. Well, I must make something out of that! An idea came to me to make a Decorative Cross piece. The dimensions of this piece are 5" wide x 14" tall. I knew mahogany had a dark rich tone when sealed with a clear sealer. For contrast I squiggled some acrylic turquoise lines to look like turquoise inlay. Since this is the back, I could practice my technique. A Key hole was installed on the back for easy hanging. I put a finish on a Leather Cross , then glued on a metal Cross with regular Gorilla Glue. I've never used this glue before, and it worked great! I sawed off the little loop hanger at the top of the metal cross and filed any sharp edges. I wanted to sand some of the sealer so I could glue on the leather cross. I traced the cross onto contact paper, cut it out and taped it onto the wood. After sanding, I glued the leather cross onto the wood using...

Western Cutouts

Image
Western cutouts are great fun and they can be used in so many ways. I drew and cut them out of plywood on a scroll saw. You can cut them out of cardboard, leather or thick paper. You can paint or stain them and then you can: Glue them to a skewer to stick in flower arrangements. Drill a hole in each and add jute to make ornaments. Glue them to boxes or frames. Make Garland. Drill a hole if it's wood or leather and make a key fob. Attach a hook to display on your saddle. It doesn't have to be western. You can make any shape you want, such as Christmas cutouts. Choose your theme, cut out your shapes and create!

Wooden Star Stirrup

Image
This Cast Iron Star Stirrup was on the website, but I have not been able to find anymore. So, I decided to make one out of wood. I placed the stirrup on plywood and traced it to make a template. I traced the star section and cleaned up the lines before I cut it out on a scroll saw. Once the templates are made, I can trace this pattern onto any wood I choose. This is cut from mahogany. When I glued and screwed it together, it broke apart. I cut another one from oak and glued it together. I used a brad nail gun to secure it. I spray painted it with a textured paint. I made another one and stained it to show the wood grain. I used epoxy on this one, which seems to work better. These Star Stirrups will make great western home décor accents!

Grapevine Wreath

Image
Making wreaths for Christmas is easy and fun! I used our 12" metal Star in Ring and an 18" grapevine wreath. Nothing says rustic and natural like a grapevine wreath. I wired the star to the wreath and made a bow and wired it on at the bottom. I added pieces of greenery and tied large rustic bells to the wreath with twine. In the beginning I was going to paint the star and bells red, but I like it just like this! For a western style wreath I used a 16" grapevine wreath and cut the top out with a saw to make a horseshoe. I added a bow at the bottom and pieces of greenery. The twig balls were in a package which I bought years ago. I thought the little twig balls would be cute with the twig wreath, so I spray painted them red and used hot glue to attach. I drew the horse on plywood, cut it out on the scroll saw and painted it red. I wrote "Howdy Y'all!" with a white paint pen. I used hot glue to attach it to the wreath. What i...

Window Picture Frame

Image
This window picture frame, which I bought at a craft store many years ago, was behind my stove in the old kitchen, but I thought I'd repurpose it. I'm sure you can still find these type of frames, or you could make your own. Another idea is to find antique windows from old houses. Print out your favorite picture or have it printed by a print service. This photo is of my two mares who were sisters. November is about the family getting together and celebrating what we are thankful for. You could print out several family photos and place one in each pane. I found a board that was already finished and was the perfect size for the shelf. It is 31" x 3 1/2" x 3/4". The window Frame is 30 1/2" x 23" tall. I drew and cut out these shelf braces on the scroll saw and gave them the same finish as the shelf, which is dark brown Briwax. I thought about painting the whole thing one color and distressing it to look old, but I like the contrast....

Western Fall Decor

Image
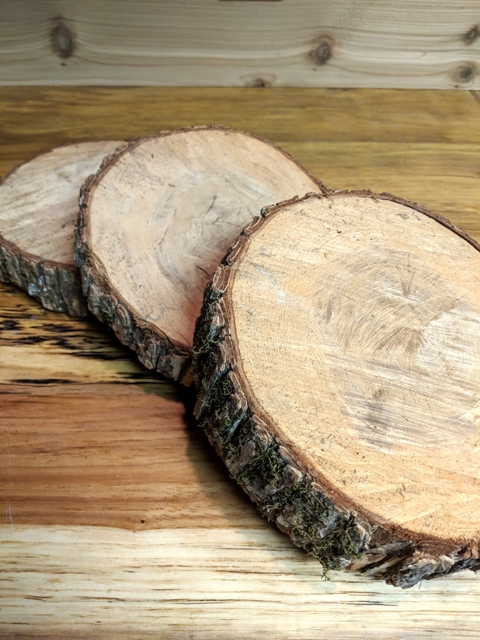
Here are a few things I put together for Western Fall Décor Ideas! These Wood slices were cut from a downed tree on our property. They were in the shed drying out for a couple of years. You can sand and seal and use them for a variety of things. I didn't sand these since I will be using them for another project. Wood Slice Centerpiece - I made a center piece with fall foliage in a horse pitcher, a ceramic Halloween pumpkin and fall leaves and gourds all placed on the wood slices. Lariat Wreath - Take a lariat and zip tie it at the top, wire on a bow and insert fall foliage. Easy! Horseshoe Wreath - I took a 16" grapevine wreath and cut the top off with a saw to make a horseshoe shape. I tied the ends at the top with brown wire just to keep it from coming apart, but it held its shape very well without it. I stuck in foliage and wired on a bow. I drew and cut out the plywood galloping horse on a scroll saw. I painted it and used a paint pen to write the...

Lazy Susan

Image
Since a friend showed me a bamboo Lazy Susan she picked up at a garage sale, I've been wanting to make one. The Lazy Susan has many uses and are great for holiday gatherings. First, I looked around for a bearing kit and found the Lazy Susan Slimline here . It has easy to follow instructions. I wanted it thin for a low profile and this is 7/64" thick and 12 5/8" wide. I chose pecan left over from my kitchen bar for the top piece. Scraps of mahogany were used for the bottom piece. Plane down the pieces to the desired thickness. These are planed to 9/16" thick. Glue the pieces together and clamp. Let dry overnight. Draw the desired size circle on both pieces and cut out on a band saw. The top piece is 16 1/2" wide and the bottom piece is 13 1/4" wide. On the bottom side of the bottom piece drill a 9/16" wide hole 1/8" deep using a Forstner bit. This was done on the drill press. Drill a 5/16...