Posts

Saddle Tree Decor

Image
  Here is an easy way to decorate western style for Fall. You may have an old saddle tree you could use or find one at a flea market. Or you may purchase our saddle tree  here . This decor would make an excellent table center piece, or place on an entry table, shelf, mantle, or porch. I put a piece of dry foam for floral arrangements underneath the saddle tree. You may need to trim it to fit and spray paint it black or brown. Then just add Fall foliage. Easy right? You need easy for the holidays. Enjoy!

Cowhide Can Koozie

Image
I had some cowhide scrap and decided to make a can koozie. I cut about a 15" x 8" piece. On the back, I laid down a regular koozie and drew a pattern around it. I used a ruler to make the lines straight. Since this koozie stretches, I made mine a little larger. I flipped it over and continued to draw the other half. This is what is would look like. I cut it out with leather scissors, or you could use a knife. It's ready for the can of your choice. I pulled the leather up around the can and held it with clothes pins. I put smaller clips to hold the leather in place and drew a line about a 1/4" from the can. This where I will sew with a sewing machine. Ready to sew. Sewn and ready to trim the excess. Trimmed. I turned it inside out and pulled it up on the can. It was tight and I let it sit overnight. The next day I stuck a pen in the side to stretch the leather and it worked perfectly. Next time I will make it a little larger. I found that this was not insulated enough...

Camp Stool

Image
  People are getting out more during these times enjoying hiking, camping, and boating. You might want to take along this nifty folding camp stool which can also be used as a side table. The overall dimensions are: 17" x 16" x 18 1/2" tall. Folded: 16" wide x 3" deep x 22" tall and weighs 8 1/2 pounds. If you want to build this stool this tutorial is for you. If you want to buy it, go here .  Here are the different parts. This stool is made of cypress and plywood, but any wood is fine. Here is the folded stool, nice and compact. You will need 4 seat support pieces and 4 leg pieces. One end of each is rounded and the other end is cut as shown. Measure 1/2", cut 45 degree angle as shown. 4 pieces 14 3/4" x 1 3/4" x 3/4", 4 pieces 22" x 1 3/4" x 3/4" with 2 holes - 11" between hole centers. You will need 2 - 1/2" plywood seat pieces 8 3/8" x 15 3/4" and 2 bottom supports 3 3/4" x 15 3/4" x 3/4...

Buckle Display Box

Image
I was called upon to create Buckle Display Boxes for prizes for rodeo events, so I thought this would be a great project for this blog. We decided on a 3 buckle box. After studying a friend's display box, these are the dimensions I chose, but they are not firm, so you can use this as a base to work from. This project is fairly easy to make. The hardest part is choosing paint colors and decoration. Red Oak pieces were cut out. Pictured is a strange rasp that was in the wood shop which I thought I would use to distress the wood. Instead I used a wire brush on the drill press. Distressing the wood. I painted all the pieces an acrylic vintage white. I didn't worry about complete coverage. This is one of my favorite brushes. I took and old fan brush and trimmed it with scissors. I dipped the brush into the paint and removed the excess. I lightly spread on the second color (acrylic aqua). You can see the detail of the distressed wood. I applied a little glue and nailed it all togethe...

Side Table with Cowhide

Image
This lumber was just sitting there waiting to be turned into a table. Sometimes I have a project in mind and go looking in the shop for the pieces I need. Other times I see a wood scrap and know what it's going to be. I saw this piece and it screamed tabletop for a side table. Yes, and trim too! I saved all of these mahogany pieces at the beginning of the year to build a side table, and envisioned cowhide on top with silver upholstery nails. This looks like a drawer but it will be turned over and become a shelf. All the pieces were cut to the chosen size and sanded. Now time to glue it up. Glued and clamped. The shelf was clamped in for support. After this dried, the shelf was glued in place and clamped. Brad nails were also used. I glued 1/4" trim around the tabletop. To attach the tabletop, I placed the legs and traced around them. I drilled a hole through the tabletop and into the legs and inserted wood screws. ...

Highchair Tray

Image
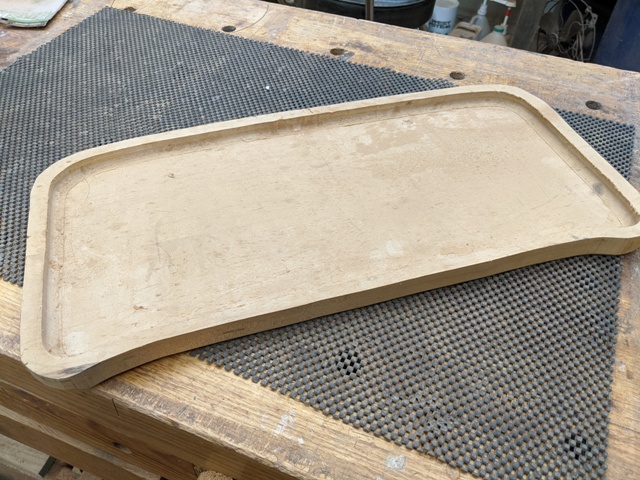
I walked into my husband's shop and found this discarded maple highchair tray on the work bench, destination: trash. In the past he had made a few highchairs, and this was a remnant of that. I grabbed it up, knowing I could use it for the blog. I decided to make a tray with tooled leather or pyrography and Steer Drawer Pulls . After the tray was sanded, I drilled holes for the Steer Pulls and installed them, then removed them to do all the finishing. The screws were counter sunk on the bottom with a 3/8 Forstner bit. This was done before the wood finish. Close up view of the Steer Pull sprayed with metallic silver. I carved this checkbook design which was taken from a book written by a friend of mine. The plan was to repeat this design across the tray, but that seemed boring to me. After much thought, I decided on a star in rope in the center. You can't get more western than that! I made a paper template for the inside of the tray, transferred it t...