Posts

Horseshoe Spur Drapery Holder

Image
I saw a picture on the internet of a horseshoe and spur that held a drapery rod. I thought, we've got horseshoes and spurs, so why not put them together and make this! Since I don't weld, I had to be creative. With the drill press, I drilled a hole at the bottom of the Large Horseshoe and used the grinder to smooth down a place for the spur. This spur was used in a previous project for a curtain tie back. I cut off the strap holder on one side with a hack saw and smoothed it down with a grinder, then drilled a hole with the drill press. The size of the hole depends on what size screw you're going to use. I inserted a screw, put a nut on the back, and spray painted it black. You could use this for a gun rack, hat hook, coat hook, or bridle hook. I think it looks great! Add the spur curtain tie back and you have a set! This would look great in a western themed bedroom or great room!

Wooden Stencil Tray

Image
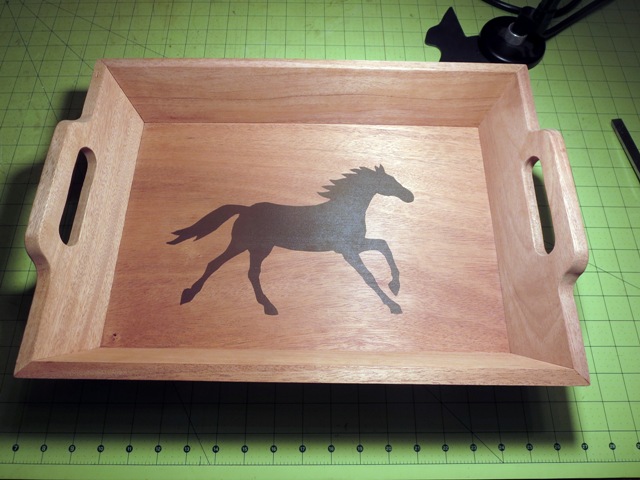
I've always wanted to make a wood tray with slanted sides. The internet didn't have much to offer, but I gave a tray I had to a friend and he figured the angles, cut sample pieces and wrote down instructions. Much better than the internet! Sample Pieces Template Tray This project can get tricky and you need to think about what you're doing every step of the way. Decide what size tray you want. How long and tall will the sides be, etc. The tray for this project is 12 3/4" wide x 18 3/8" long at the top of the handles. A side piece measures 2 3/4" x 17 7/8" x 1/2". The end piece measures 2 3/4" x 12 3/4" x 1/2". If you measure the slant the side is 3" and the end is 4". You can make it out of ply wood or any solid wood. I chose mahogany for this project. Turn blade on table saw to 17 degrees and rip one side, flip board and move saw guide to the desired thickness and rip. The top and bottom are parallel to ...

Outlet Cover

Image
After the kitchen remodel, I wanted to make barn wood outlet covers to blend in with the backsplash which is distressed oak wood look tile. Using a standard duplex outlet cover I traced the design on to barn wood that was planed to 1/4". I cut it out with a scroll saw and drilled the hole for the screw. I used a 1/4" drill bit to make a recess for the screw head. I placed a receptacle on the cover plate and marked where to recess it on the back side. I used a Dremel tool with a wand and sanding drum attached... ...to recess the back. I painted the screw to match the wood. I also made a decora style cover. The back was routed, and holes drilled for screws. The slanted grain of the wood matches the barn wood backsplash. This was not an easy project, but well worth it. If you try it, send us some photos.

Kitchen Remodel

Image
Happy New Year! The New Year is about new beginnings. Well, my kitchen has a new beginning! After 35 years I decided to give my kitchen a new look! This is a photo of the old kitchen with Saltillo tile floor and ceramic tile countertops. In the new kitchen the cabinets are made of reclaimed oak from old barns and buildings. Notice we removed the cabinet above the bar. Wood look tile floors, Dekton countertops, rusty looking pulls and travertine backsplash complete the new look. The fluorescent light will be replaced with LED down lights. The wood look tile for the floor was cut in half and used for the backsplash. The same tile frames the 3" x 6" travertine tile which is in a herring bone pattern. I added Medium Star Nails above the oven. I painted them to match the pulls. The low bar is made from old pecan and wow, what character! The bar chairs will be refinished and cushions replaced. The wood for the cabinets was planed smooth, but I used...

Christmas Tree

Image
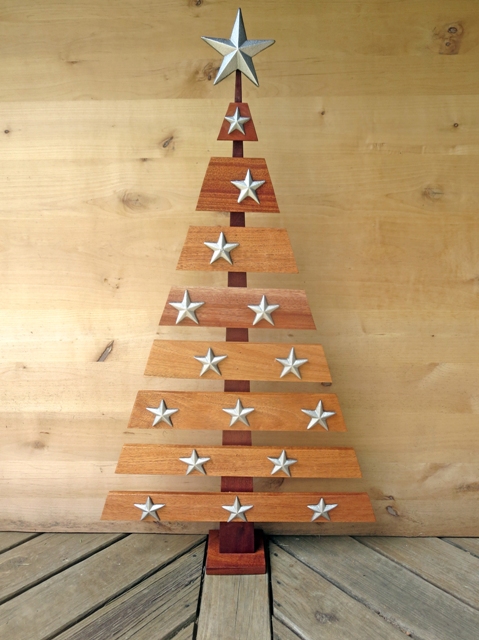
This is my version of the pallet wood Christmas Tree. This tree is made with mahogany since we have plenty of it in our shop. A mahogany base is screwed and glued onto a dagger board drop. My husband makes dagger boards for sailboats. They are used to keep the boat from sliding sideways during sailing. Mahogany boards are screwed onto the dagger board drop. A straight edge is used to draw a line where you want to cut. Cut the boards with a jig saw. A coat of varnish or sealer gives the mahogany a rich tone. Nail Small Star Nails to a board to spray paint with metallic silver. If you drill a hole a little smaller than the nail, they easily tap into the mahogany. A Large Star Nail was added to the top. Place this tree on your porch or brighten up a corner of your home. Merry Christmas!

Rustic Tray

Image
Trays are good to have around during the holidays. Use them to serve your guests or decorate with your favorite holiday décor. Take this idea and make it your own. I cut 4 pallet boards 13 1/2" long. I used a nail gun to nail 2 boards 19 3/4" long to the back of the 4 short boards. I cut off pieces of a pallet support board for the handles and nailed them into the bottom boards. I added Clavos to the top of the handles. I added smaller Clavos to the ends of the 4 short boards. Happy Holidays!