Posts

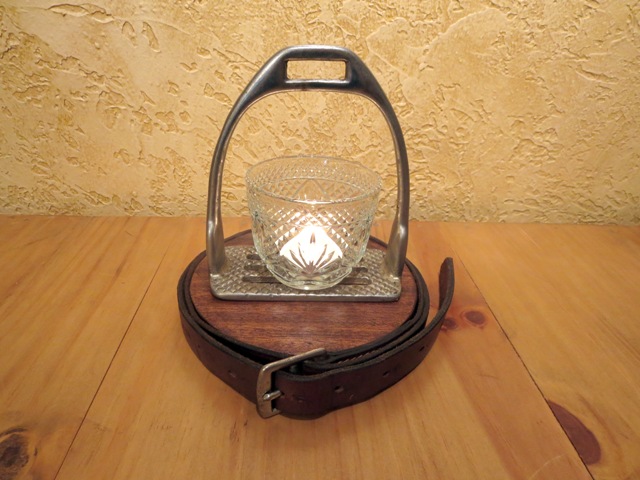
Stirrup Candle

Image
Here's a way to use old stirrups in your home décor. I cut a 6 1/2" disc out of wood and rubbed on a coat of dark brown Briwax. I wrapped the stirrup leather around the wood and placed the stirrup and tea light on top. Gather several old stirrups from friends and family to create table center pieces for parties. You could also use a flameless candle. I sanded the disc and painted it aqua and white and added 3/4" silver Clavos  around the edge. Here's another old stirrup I've had for many years. I used a 5" cast iron Star in Rope  and the Leather Star Bracelet (No longer available) to connect it together. Stirrup Towel Holder

Western Coat Rack

Image
Make a rustic Western Coat Rack using weathered pallet boards and your favorite picture. I chose, cut and laid out the weathered pallet boards. Then screwed supports on the back. I printed a photo and placed it on the boards with double stick tape. I cut a slit in the photo between the boards to make 2 pieces. With painter's tape I outlined the photo, then removed the photo and the double stick tape. I spread a coat Mod Podge, placed the photo and spread another coat over the top. I smoothed with my fingers and a brayer, but it still wrinkled a bit. Maybe it was the type of paper I used. I pulled up the tape after it dried and screwed in Hall Tree Hooks and Small Coat Hooks . Here's another idea. Screw hooks to your favorite framed picture for quick entry way coat rack.

Cowhide Tray

Image
Turn a wooden tray into a western cowhide tray. You can purchase the Wood Tray here , or you can use any wood tray you have. First I sanded the bottom of the tray and vacuumed the saw dust. I cut a template out of cardboard and placed on the cowhide to mark it and cut it out. Next I placed the cowhide on wax paper and brushed Titebond Original glue onto the cowhide. Be sure to brush out to all of the edges. Then place the cowhide into the tray and slide around until it fits. Keep smoothing it down to make sure the whole surface of the cowhide is in contact with the surface of the wood. I used my fingers, but you might want to use a roller. You could nail furniture tacks around the edges, but I like it the way it is.

Carved Wood Bowl

Image
The colors on this hand carved wooden bowl didn't exactly turn out as I had envisioned, but maybe it will give you some inspiration. I painted the bowl white then streaked it with turquoise, sanded it and applied light brown Briwax. I glued a painted leather cross with Tite Bond Original to the bowl and nailed in brass furniture nails.

Cowboy Star Hook

Image
I thought this would be cute. I found these rusty cowboy and cowgirl cutouts from one of my suppliers. The Star 2 Hook is on the website. Put pallet boards together and screw vertical pieces to the back to hold it all together. Screw the items to the boards. I found screws painted brown at a local hardware store and you could screw or epoxy the characters.

Cross Bench

Image
You can use our Cross Brackets to make this simple bench. The top piece is 11 x 36 x 1 1/2 and the legs are 11 x 16 x 1 1/2 pine. Four Cross Brackets were screwed into the top piece and leg pieces. I removed the hanger from each of the small crosses which I wanted to attach to each leg. Then found a longer screw that would fit it and drilled a hole in the leg piece. Use a counter sink bit if necessary. Screw the cross to the leg piece from the inside. After the dark brown Briwax  finish was applied I noticed my sanding marks which gave it a distressed look. There are several other types of braces on the website that you could use such as Star Braces, Cobb Webb Braces, and Horse Braces. The items used in this project are: Cross Bracket Small Cross D58-078

Cowhide Frame

Image
Here's an idea for a western frame. I wanted to add hair on cowhide to an 8x10 barn wood frame and had some strips from another project that fit perfectly inside of this frame. That was easy! With a leather rotary cutter I had to cut 2 more strips to have enough. I glued them to the frame with hot glue, but next time I would use epoxy or Titebond the original. Holes were drilled for the 1" silver Clavos in the corners and I attached one 3/4" on each side. I sprayed Small Star Nails metallic silver and drilled holes to nail them into the upper and lower part of the frame. These star nails had longer nails so I was able to nail them in and keep them on the outer portion of the frame. It was a simple design and not a lot of work. Hopefully this will give you inspiration to come up with your own fancy creation.