Posts

Showing posts with the label wood crafts

Cowhide Coaster Box

Image
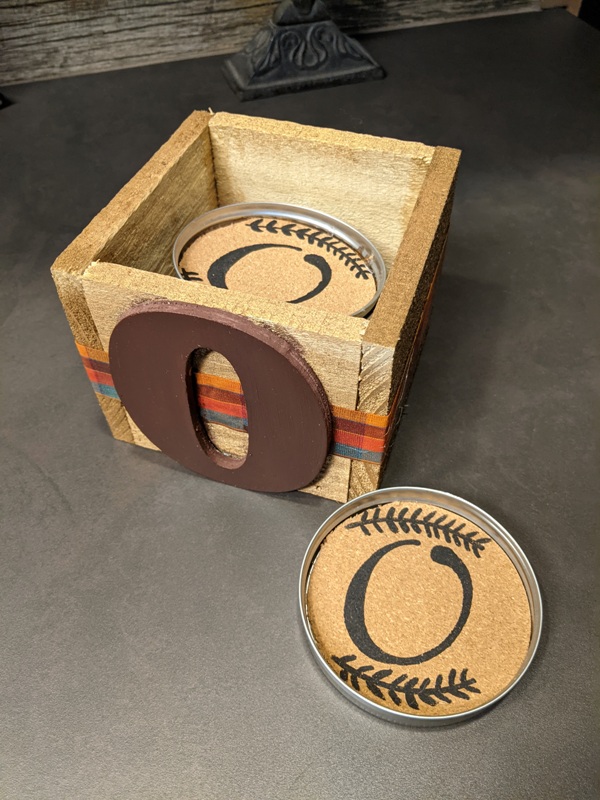
  A friend of mine made this coaster set and box for me. Very cute, and some may want to go this route, but it gave me an idea to make one western style. Here are the wood pieces for the box. Four sides of mahogany, or any wood you have on hand, and a plywood base. There are two pieces 5 3/4" x 2 3/8" x 1/2" and two pieces 6 3/4" x 2 3/8" x 1/2". The bottom piece is 5 3/4" x 5 3/4". The box is glued together, and brad nailed to secure. I cut a piece for a lid and glued a smaller piece to the underside to fit inside the box. The lid dimensions are 6 3/4" x 6 3/4" x 1/4" and the smaller piece is about 5 5/8" x 5 5/8". I glued hair-on cowhide around the box. I glued cowhide to the top of the lid. I painted the bottom of the lid and the bottom and inside of the box black. I spray painted a steer drawer pull oil rubbed bronze and mounted it to the top of the lid. I placed a strip of leather 1" wide around the box and nai...

Side Table with Cowhide

Image
This lumber was just sitting there waiting to be turned into a table. Sometimes I have a project in mind and go looking in the shop for the pieces I need. Other times I see a wood scrap and know what it's going to be. I saw this piece and it screamed tabletop for a side table. Yes, and trim too! I saved all of these mahogany pieces at the beginning of the year to build a side table, and envisioned cowhide on top with silver upholstery nails. This looks like a drawer but it will be turned over and become a shelf. All the pieces were cut to the chosen size and sanded. Now time to glue it up. Glued and clamped. The shelf was clamped in for support. After this dried, the shelf was glued in place and clamped. Brad nails were also used. I glued 1/4" trim around the tabletop. To attach the tabletop, I placed the legs and traced around them. I drilled a hole through the tabletop and into the legs and inserted wood screws. ...

Bookends

Image
I saw a picture of a handmade rustic bookend with clavos and it gave me an idea to create western style bookends. The possibilities are endless! We have a lot of scrap ash wood in our shop, so I decided to make the bookends from those scraps. I had a set of small scroll shelf brackets and thought it would be an easy bookend. I cut out the scallop design on the scroll saw. All the bookends in this project are approximately 6.5" wide x 7.5" tall x 3" deep. The wood is 7/8" thick. The Boot and Horse cutouts are approximately 7/8" thick. I painted the wood dark brown acrylic, let dry, then antique white, let dry and sanded some of the white off. I screwed on the bracket, which held the bookend together. I traced the horseshoe onto wood and cut it out on the scroll saw and screwed the horseshoe to it. I spray painted it black. I found a few pieces of teak, glued and screwed them together and added 2 coats of polyurethane. I glued and s...

Window Picture Frame

Image
This window picture frame, which I bought at a craft store many years ago, was behind my stove in the old kitchen, but I thought I'd repurpose it. I'm sure you can still find these type of frames, or you could make your own. Another idea is to find antique windows from old houses. Print out your favorite picture or have it printed by a print service. This photo is of my two mares who were sisters. November is about the family getting together and celebrating what we are thankful for. You could print out several family photos and place one in each pane. I found a board that was already finished and was the perfect size for the shelf. It is 31" x 3 1/2" x 3/4". The window Frame is 30 1/2" x 23" tall. I drew and cut out these shelf braces on the scroll saw and gave them the same finish as the shelf, which is dark brown Briwax. I thought about painting the whole thing one color and distressing it to look old, but I like the contrast....

Lazy Susan

Image
Since a friend showed me a bamboo Lazy Susan she picked up at a garage sale, I've been wanting to make one. The Lazy Susan has many uses and are great for holiday gatherings. First, I looked around for a bearing kit and found the Lazy Susan Slimline here . It has easy to follow instructions. I wanted it thin for a low profile and this is 7/64" thick and 12 5/8" wide. I chose pecan left over from my kitchen bar for the top piece. Scraps of mahogany were used for the bottom piece. Plane down the pieces to the desired thickness. These are planed to 9/16" thick. Glue the pieces together and clamp. Let dry overnight. Draw the desired size circle on both pieces and cut out on a band saw. The top piece is 16 1/2" wide and the bottom piece is 13 1/4" wide. On the bottom side of the bottom piece drill a 9/16" wide hole 1/8" deep using a Forstner bit. This was done on the drill press. Drill a 5/16...