Posts

Star Tray

Image
I made a wood star tray with molding for the sides. The shape is like a primitive star. You will be cutting 10 pieces any length you want. These were about 5 inches and the star was about 13 1/2 inches wide. You may want to cut scrap pieces before cutting the actual molding. First make a jig for the cuts at the points of the star. Screw a piece of wood onto a piece of 1/2 inch plywood at 54 degrees. Put your miter saw at 30 degrees and clamp and cut each piece making sure to lay it on the correct side so that the cut pieces fit together. Cut the pieces about 2 inches longer than you want them to be. Diagram of the jig. The other end is cut at 30 degrees. Clamp a scrap piece and place the piece to cut against it so they will all be the same length. Clamp each piece you are cutting so it doesn't move and make sure to lay it on the correct side. Tape all the pieces together to make sure they fit, then glue and tape. Let dry overnig...

Longhorn Jewelry Holder

Image
Here's a way you can use our Longhorn Skull Drawer Pulls . The post and base are put together with a mortise and tenon joint, glue and a screw in the bottom. Drill holes where you want the drawer pulls. I sprayed a couple of coats of varnish, let dry and attach the drawer pulls. You can paint the wood or the drawer pulls any color you desire.

Western Garland

Image
This Western Garland is a new item. What fun you can have with this! It’s made of metal or tin with coiled wire and painted brown. It is 8 foot long with a loop on each end to attach anywhere you want. You can spray paint the whole thing a different color or multi colors. You could paint each piece a different color. It would be great for birthday parties or any holiday or just decoration on the mantel year round. You could even cut the wire, pull each piece out, attach a wire loop where the holes were, paint your choice of color and use for western ornaments! You could also weave it into some pine garland or into a wreath. You have a choice of Texas, Steer, Boot or Horse or buy all four so you have a big variety. I’m sure there are many more ways to use this garland. Have fun!

Decorative Horseshoes

Image
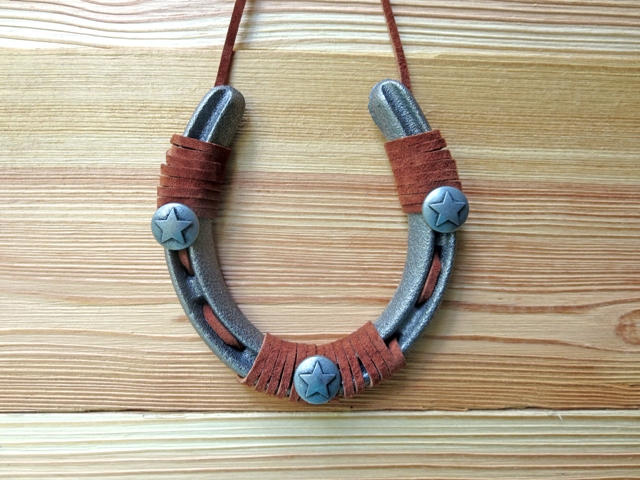
Decorating horseshoes is fun and easy and great for kids. Our Large Horseshoe is a perfect size for this. Here are a few ideas to spark your imagination. If you're giving as a gift you can personalize it, decorating with what that special person likes. This one has leather lacing and pewter Star Tacks. This horseshoe has turquoise leather cord, a horseshoe nail cross wrapped in copper wire and three horseshoe nails attached at the bottom. The Texas Magnet attaches easily to the cast iron. You could use any type of magnet. There is also leather lacing, Oil Rubbed Bronze Star Tacks, and a leather star which can be hot glued on. This horseshoe is wrapped in black leather lacing with wooden black beads at the bottom. The cross is from the Western Cross Magnets Set. It has a clip on the back so I just clipped it to the leather lacing. Happy 4th of July! Of course I had to be a little patriotic today. This horseshoe is wrapped in red and white leather la...

Red White and Blue Horse Hook

Image
Here's another idea for July 4th. Paint the cast iron Horse Head 3 Hook red, white and blue and attach bling stars with hot glue. Fun for kids too!

July 4th Wreath

Image
July 4th is around the corner! Time to make a patriotic wreath. I found all this burlap ribbon on sale last year and have been saving it just for this. There are lots of videos on making burlap wreaths and bows so you can do it! I used a wood cut out horse from a previous post and painted it like a US flag. I would hot glue it or hang it with wire. Have fun!

Southwest Frame

Image
I saw this frame in a local Mexican Restaurant and thought I would try to make it. I found this molding in the home improvement store. First using a router I cut the edge where the picture is inserted. Cut the 45 degree angles on a non electric miter saw and did a little sanding. This is a 11x14 frame. I marked the center of each piece and drew the lines for the cuts which are an inch apart. I made the cuts on the scroll saw. It fit together nicely. So I glued the joints and used a brad gun on the corners, then hammered in a corrugated fastener. I spray painted the frame with a turquoise blue color and put in a colorful picture. I think it turned out well.